Defeating Saya and Selyne: Ultimate Palworld Moonflower Tower Guide 2025
Conquering the formidable Tower Bosses in Palworld remains a pinnacle achievement for any dedicated player in 2025. These powerful adversaries, each paired with an immensely strong Pal, dominate specific regions across the expansive map. While the temptation to challenge them immediately upon discovery is strong, proper preparation is absolutely critical for success. Saya, the leader of the notorious Moonflowers gang, and her partner Selyne, pose a significant threat within the Sakurajima Islands. Selyne's diverse elemental arsenal can swiftly overwhelm unprepared challengers, making strategic gear selection and team composition the keys to victory. This guide delves into the essential strategies, recommended equipment, and battle tactics needed to emerge triumphant against this daunting duo. ⚔️
Locating the Moonflower Tower
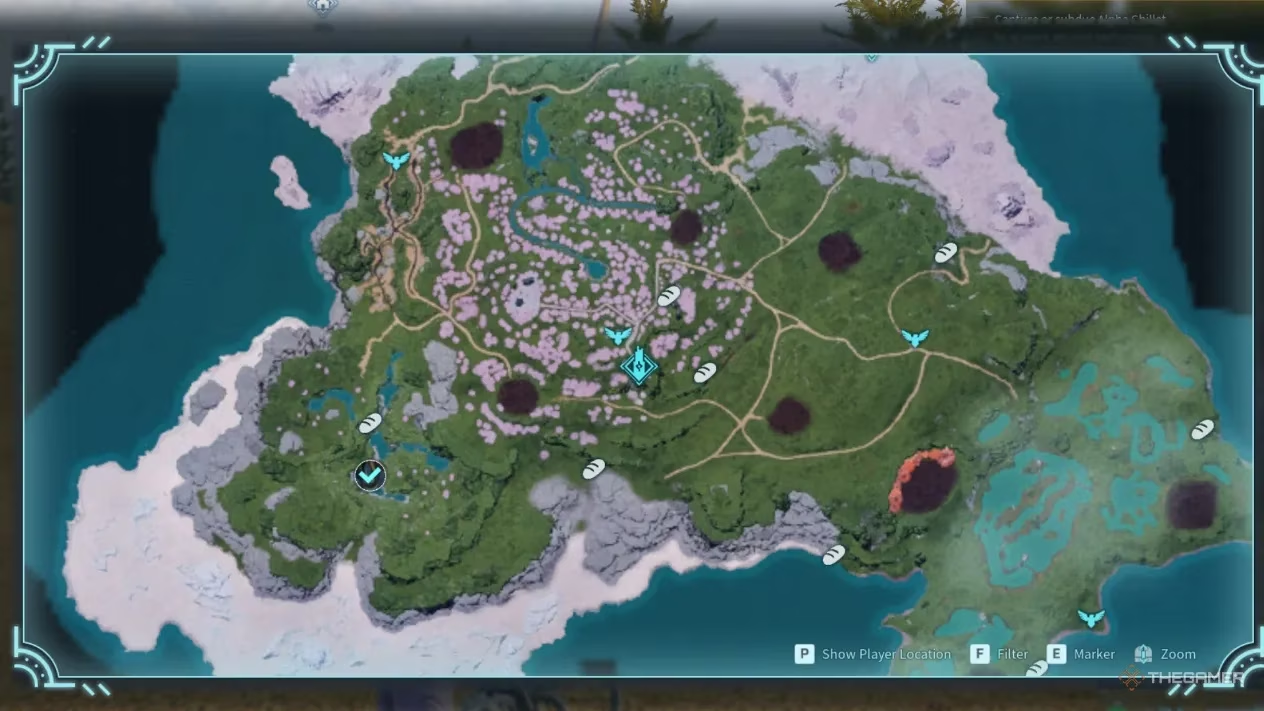
The Moonflower Tower, Saya's stronghold, is situated near the central region of the Sakurajima Islands. Adventurers will encounter it after navigating through the picturesque Dancing Sakura Shrine area. Its precise coordinates are -597, 206. However, the journey is perilous; the Sakurajima Islands are teeming with high-level Pals. Venturing into this zone under-leveled is a recipe for disaster. It is highly recommended to achieve at least level 50 before attempting to locate and challenge this boss. The surrounding areas serve as a natural barrier, ensuring only the most prepared trainers can reach the tower's entrance.
Essential Battle Preparations
Engaging Saya and Selyne with subpar equipment is a guaranteed defeat. This duo possesses the raw power to eliminate unprepared players in mere seconds. Survival hinges on equipping high-tier armor and strategic accessories that can mitigate Selyne's devastating offensive capabilities.
🔮 Recommended Accessories
Equipping the right accessories provides a crucial stat boost for the encounter. Here’s a breakdown of the most effective options:
| Accessory | Effect |
|---|---|
| Ring Of Ice Resistance | Significantly negates incoming Ice damage. |
| Defense Pendant | Boosts your overall defense stats. |
| Life Pendant | Increases your maximum health pool. |
| Attack Pendant | Enhances your attack power. |
The Ring of Ice Resistance is non-negotiable for countering Selyne's lethal ice-based skills. Coupling it with an Attack Pendant allows you to deal substantial damage. The Life Pendant is a valuable optional choice for players who find themselves frequently low on health during intense battles.
️ Armor Selection
Your armor is your primary defense. The following table compares top-tier options for 2025:
| Armor | Defense | Health |
|---|---|---|
| Lightweight Plasteel Armour | 400 | 1300 |
| Plasteel Armour | 385 | 1300 |
| Plasteel Helmet | 260 | 600 |
| Pal Metal Armour | 220 | 750 |
The Lightweight Plasteel Armour should be your top priority for its superior balance of defense and mobility. If you are exceptionally skilled at dodging and prefer a more aggressive approach, the Pal Metal Armour can be a viable alternative.
💥 Optimal Weaponry
Choosing the right weapon is paramount for dealing damage efficiently from a safe distance.
| Weapon | Attack | Description |
|---|---|---|
| Laser Rifle | 1250 | Fires a precise laser beam; ideal for headshots. |
| Guided Missile Launcher | 5900 | Launches homing missiles that track the target. |
| Rocket Launcher | 10,000 | Fires a high-damage, unguided rocket. |
The Laser Rifle excels for players confident in their aim, as landing headshots on Saya or Selyne results in significant critical damage. For those who struggle with precision, the Guided Missile Launcher or Rocket Launcher offer tremendous burst damage potential, making the fight considerably shorter.
Forming Your Pal Team
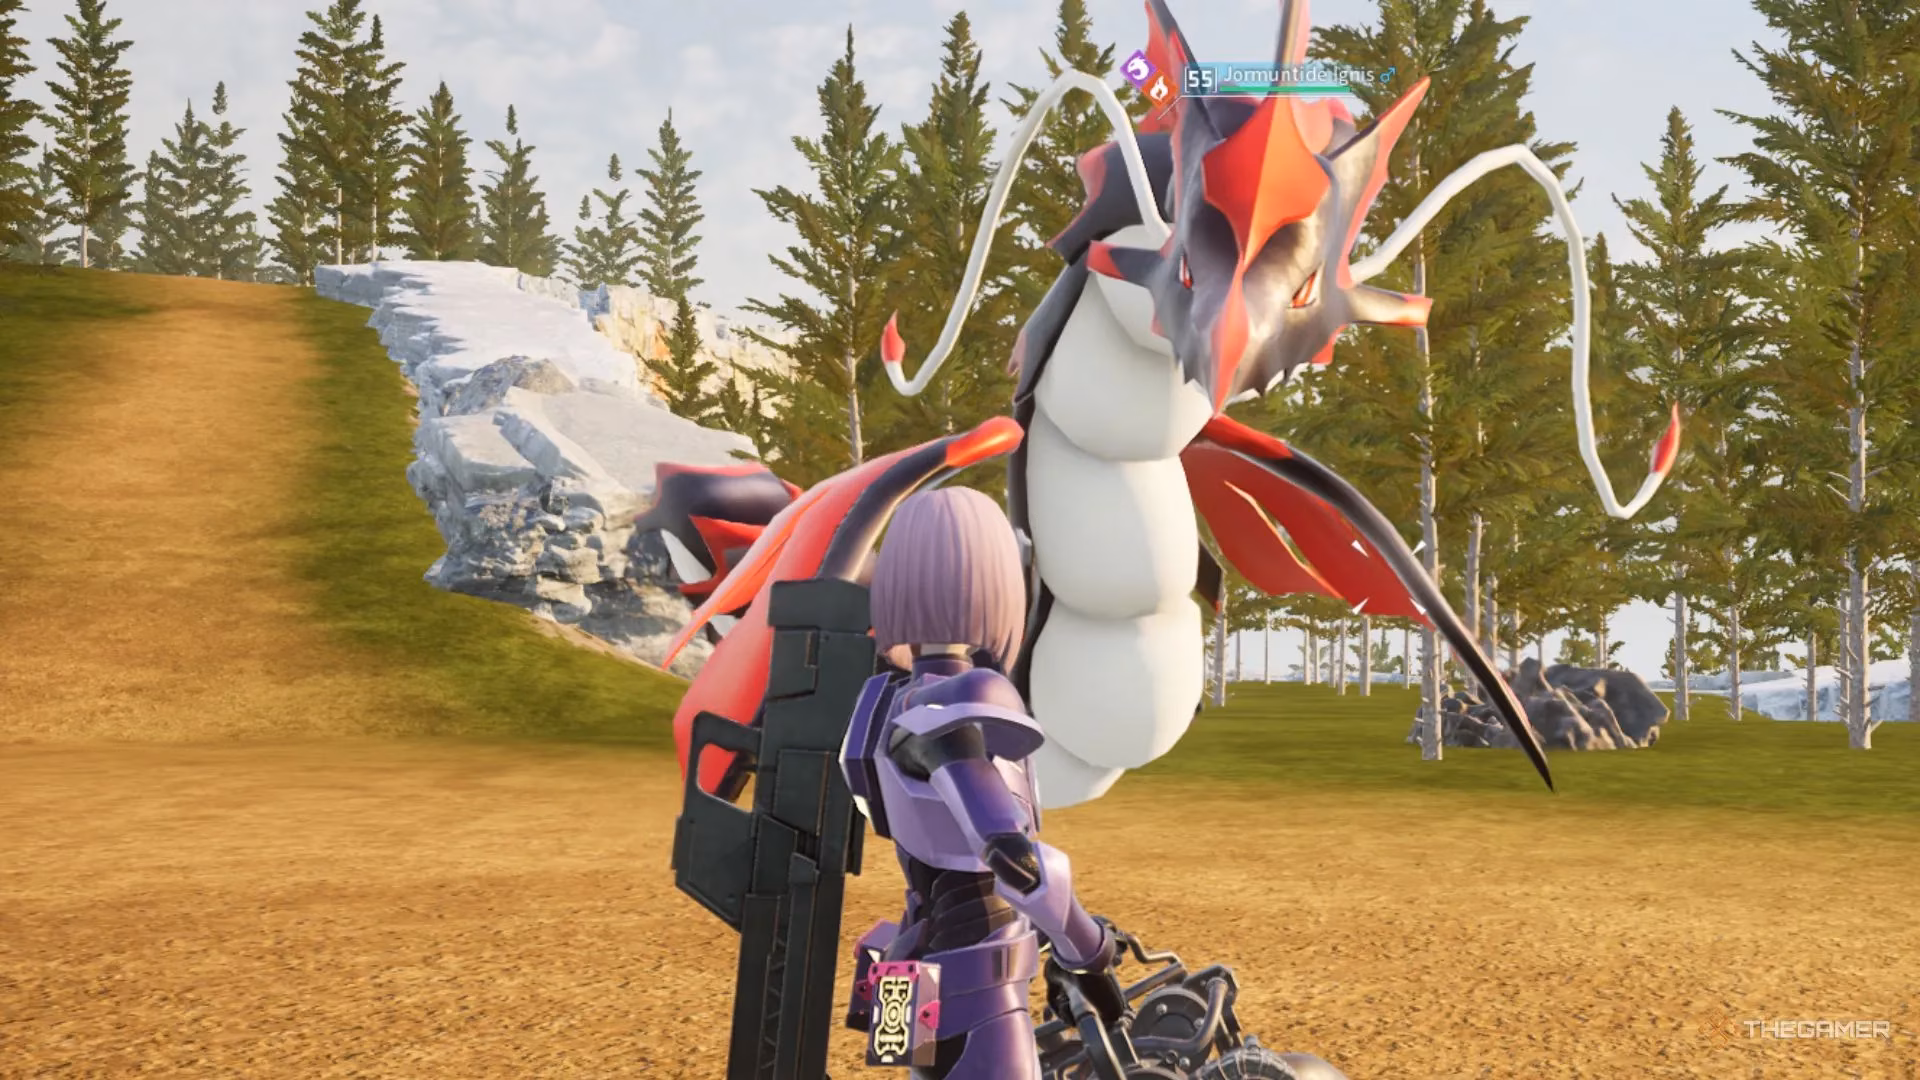
Selyne is a dual Neutral and Dark-type Pal, making it strong against other Neutral types. Dragon-type Pals are supremely effective against it. Your team should be heavily populated with powerful Dragon Pals to exploit this weakness. Here are some top-tier recommendations for 2025:
| Pal | Attack (Level 55) | Defense (Level 55) |
|---|---|---|
| Jetdragon | 997 | 721 |
| Blazamut Ryu | 653 | 581 |
| Jormuntide Ignis | 772 | 523 |
Ensure your Dragon Pals are equipped with their most powerful moves to maximize damage output.
| Skill | Power |
|---|---|
| Dragon Meteor | 150 |
| Beam Comet | 140 |
| Comet Strike | 110 |
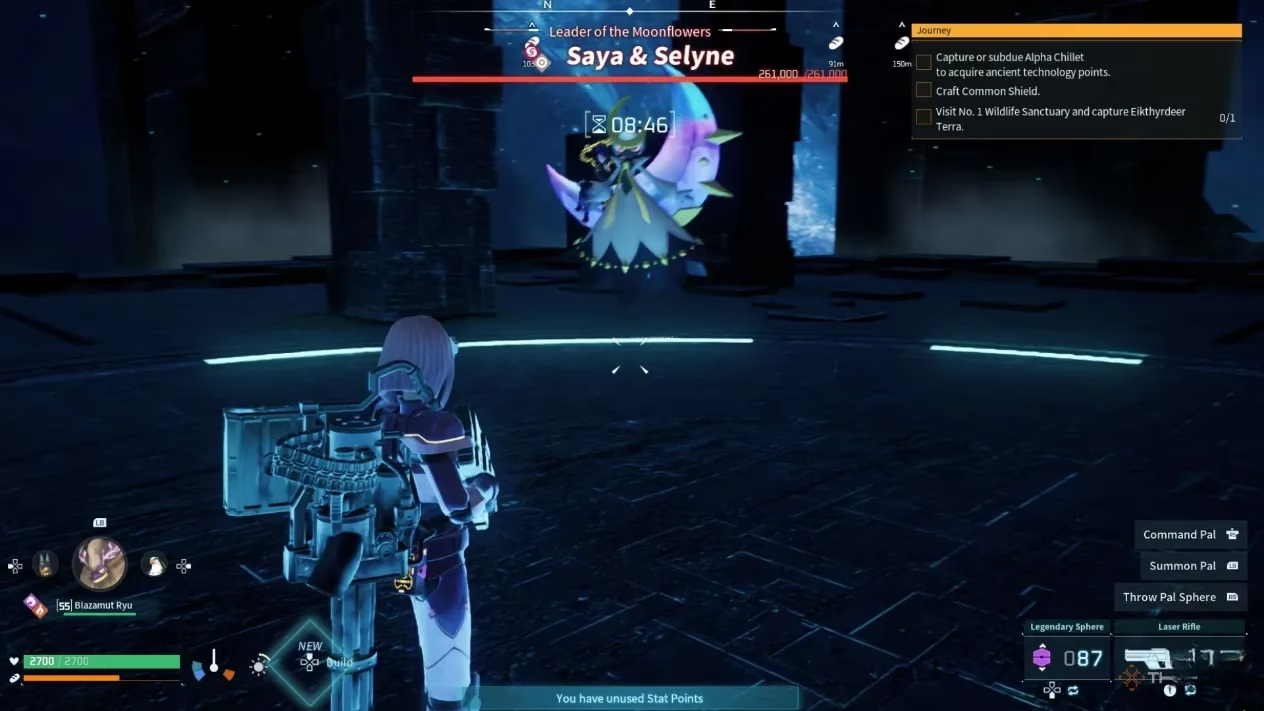
Understanding Saya and Selyne's Attack Patterns

The boss duo boasts a colossal 261,000 HP pool. They primarily utilize a variety of ranged attacks that require constant movement and precise timing to avoid. The optimal strategy involves maintaining distance, using your ranged weapons, and meticulously dodging their telegraphed skills.
Here is a complete breakdown of their attacks and how to counter them:
| Skill | Description | How To Avoid |
|---|---|---|
| Nightmare Ball | Selyne conjures and launches a massive Dark Ball. | Roll sideways as the ball approaches. |
| Comet Strike | Throws a meteorite that creates a damaging shockwave. | Evacuate the marked impact zone and jump over the ensuing wave. |
| Air Blade | Projects several blades of air toward the player. | Dodge perpendicular to their linear path. |
| Moonlight Beam 💥 | Fires a devastating laser beam from its crescent. | Sprint or roll laterally to escape the beam's narrow path. |
| Seigetsu Blade | Hurls two crescent-shaped energy blades. | Roll away from the projected trajectory. |
| Dark Arrow | Rapidly fires multiple dark projectiles. | Perform quick, successive rolls as they close in. |
| Holy Burst | Creates a large explosive area after a brief delay. | Continuously roll until you are completely outside the marked circle. |
| Blizzard Spike ❄️ | Shoots a fast-traveling ice projectile. | Roll the moment the attack is telegraphed. |
| Star Mine | Summons stars on the battlefield that explode. | Do not touch the stars and create distance quickly. |
| Power Bomb | Launches a slow-moving energy orb. | Roll away as it nears your position. |
| Diamond Rain | Calls down a shower of ice projectiles from above. | Stay clear of the circular markers on the ground indicating impact zones. |
By mastering these dodges and leveraging the recommended gear and Pals, you will be well-equipped to claim victory against one of Palworld's most challenging boss encounters. Good luck, Trainer! 🎯
Comments